
** More in Depth Video Tutorial coming in next couple days**
I am excited to finally get to share my hair extension tutorial with you guys and show you a new easy way to wear your hair extensions! no clips, glueins, tape ins, weave ins. You heard it right! your probably wondering by the title of this blog "what are Halo Extensions" ( if you dont know already) and I am here to explain :)
Halo Crown Extensions are actually a brand by Halo extensions that sell one long piece of hair extensions that are connected to a clear string and then put into the hair. Sounds crazy right?
here are the actual Halo extensions below

as you can see you simple put it on like a halo and then using a pic comb, you just pull out the hair then voila! in under 30 seconds you have beautiful extensions! Its that easy yall.

Your probably wondering "what if they accidentally come out" .. These fit to your head and stay put as well as clips would! If you are interested keep reading for the tutorial!
Diy Halo Crown Extensions
youll need:
monofilement wire (walmart $2)

hair extension Trac
( prices vary, mine are brazillian Remi 16 inches. I paid $70 for mine)

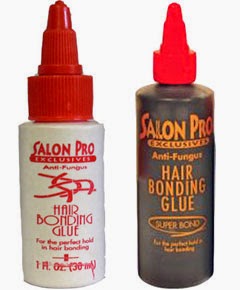
Hair Bonding Glue
($2-$4)
Depending on what color your doing depends on the glue you want/need.
The first thing you want to do is shape the trac to your head and measure how you want the halo to fit.

I didnt take pictures of me measuring my head but I have a link above with video footage to better explain. But what you want to do is make sure it fits up to right behind your ears. hold your place then cut each trac that same length. The tracs will be quite thin, so you want to make it fuller by using 4-5 tracs of hair.
should look something like this as far as measuring points


Next part is glue. you want to Glue on the top of the trac line of the extension. Apply the glue all the way across and wait 30 seconds for the glue to become tacky before applying your first trac


you want to repeat this step until you have all the tracs glued together. If you feel like you want more fullness, glue more tracs of hair until you reach your desired thickness.
next is adding the monofilement.

you want to do this as close to the end as possible. you basically are putting the string under the bottom and looping it around as you see I have both pieces to show you im about to start to tie them into knots. I did this about 4-5 times. make sure its a good tight knot. Keep the other side of the string still attached to the roll of string as your going to measure just how much you need to cut on your head.
Below as you see me doing, I am just measuring how tight I want the String to my head. You want it comfortable but secure. You want to remember that once you put in the final piece, It will start about an inch to 2 inches from front of head. My pic shows mine a little further back than It should be but I corrected it.

Then once you have measured it, you just want to hold your place and repeat the knotting process on the other side. Once your done, go ahead and cut pretty close with little slack leftover.
below is how they turned out. I know I look quite silly because this was before I colored my faded Bluish Blonde hair darker to match. Lol.


After I did this I then Colored and Cut my hair extensions along with my own hair using Brown Black hair color.

Then I cut them and layered them using shears and thinning shears to match and blend well with my hair!


I hope you enjoyed this tutorial !
In my opinion , hair extensions are such a great discovery. Most of the time, you wouldn’t even recognize if you’re looking at synthetic hair or not, especially if one has been positioned well. With your tutorial, a lot can learn how to apply hair extensions on their own. Rather than going to the salon and paying extra for setting it up, you made it seem so easy to do that everyone will positively benefit. Thanks for sharing! All the best to you!
ReplyDeleteDelia Jensen @ BestVirginRemyHair
Dyeing your hair and the extensions with the same product will make it easier to blend the extensions in, especially if you plan to keep those extensions for quite some time. And I also like the fact that you trimmed it to create a much better fit. Anyway, thanks for sharing this tutorial with us, Maranda. All the best!
ReplyDeleteTommy Clark @ Her Hair Company Inc.
Wow! Your post will definitely be helpful to those who are looking for something new to try with their hair extensions. Dyeing hair extensions, with the same color as your natural hair will really make it look more natural and blend in. Thanks for sharing that, Maranda! Stay gorgeous!
ReplyDeleteRenee May @ Virgin Hair Fixx